How to take a screenshot on a PC
Looking to take a screenshot? Perhaps you need to send one to tech support or just capture something funny to post on Twitter. Let’s start with the easiest and most straightforward way: Keyboard shortcuts.
SCREENSHOTS WITH KEYBOARD SHORTCUTS
Quick tips:
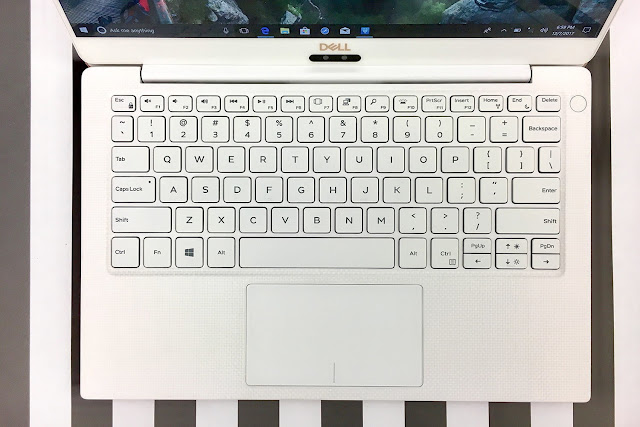
- Your keyboard’s Print Screen key copies your current screen. You can then paste it into image editing software with Ctrl + V. If you have multiple monitors, this method will create one wide image including all of your displays.
- Pressing Alt + Print Screen will capture only the currently selected window.
Taking a screenshot is simple, regardless of which version of Windows you’re running. There are only a few steps — assuming you haven’t fiddled with the default keyboard controls and shortcuts — and if you need some free image editing software to tweak them, these are our favorites.
Step 1: Capture the image —
Assuming the area you want to capture is displayed on your screen, press the “Print Screen” (often shortened to “PrtScn”) key, typically located in the upper-right corner of your keyboard, to capture a screenshot of your entire display (again, including multiple displays). Alternatively, press “Alt + Print Screen” to capture a screenshot of the active window.
If you’re on a laptop, you may need to press “Fn” + “Print Screen” if your laptop has another feature assigned to that particular key.
There will be no noise or any other indication the screenshot was taken, but the resulting image will be saved as a PNG file to your clipboard. Unless you’re using a version before Windows 8, press the Windows Key + Print Screen to automatically save a full-screen screenshot within the “Screenshots” folder of your picture directory.
If you have Dropbox installed, the screenshot will also be automatically deposited in your Dropbox directory, under Screenshots — great for your “Showcase.” Microsoft’s own OneDrive will do the same if you’ve told it to do so when you first take a print screen after configuring it. You’ll find screenshots in your OneDrive folder in Pictures > Screenshots. We provide additional details on the OneDrive method in the next section.
Step 2: Open Paint —
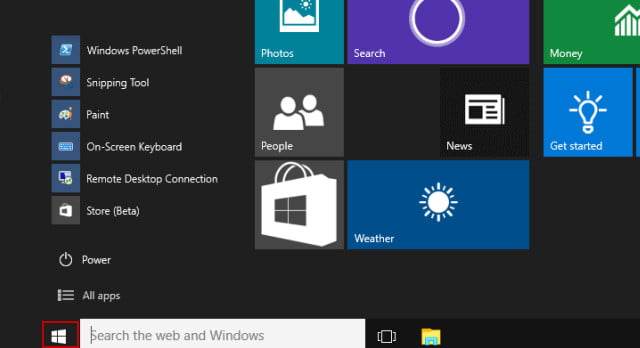
In versions of Windows 10 prior to Fall Creators update, you can open the Start menu, go to “All Apps,” and scroll through the alphabetical list until you find Paint. Alternatively, and for Fall Creators update and later, use the Windows search box to look for “Paint” and click the corresponding icon.
If using Windows 7 and 8, you can find the Paint app in a few different ways, but both support the search tool which will find what you need straight away.
Step 3: Paste the screenshot —
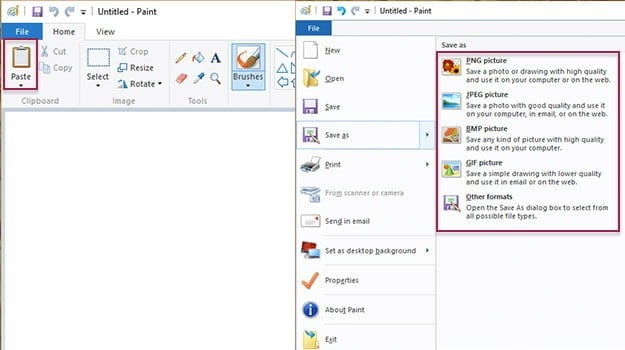
Once Paint is open, click the “Paste” button in the upper-left corner of the program, choose “Edit” then “Paste,” or press “Ctrl” + “V” on the keyboard to paste your screenshot.
Step 4: Save the screenshot —
Perform any edits you want, such as cropping the image to a specified area, and click the main “File” option in the upper-left corner, followed by “Save as.”
Step 5:
Title the new file, choose a save location, and select your desired file format from the drop-down menu. For most purposes, JPG will do fine, but a variety of other formats are available to choose from such as PNG, BMP, GIF, and others. Click the gray “Save” button in the bottom-right corner when finished.
how to take a screenshot in laptop
how to take a screenshot on laptop
how to take a screenshot in mac
how to take screenshot in pc
how to take screenshot in laptop
how to take a screenshot on pc
how to take a screenshot in pc
how to take a screenshot on pc
how to take a screenshot on a pc
how to take screenshot in pc
![]() You May Also Like
You May Also Like


